Create a lego or hot wheels wall
Upgrade your child's bedroom and take advantage of unused space by getting toys off the floor and onto the walls.
Many of your child's favorite toys — from Legos to Hot Wheels — can get off the floor and go vertical!
You can save valuable floor space in your child’s room by going vertical. We are always telling our kids to pick up their toys and now they'll be happy to do so with these fun ideas.
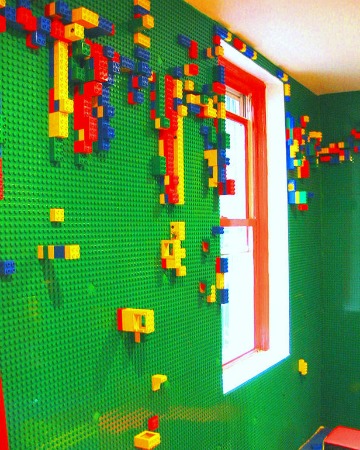
Lego walls
You've probably seen the photos of Lego walls on Pinterest and YouTube. And now, you can create a Lego wall with ease.
What you'll need:
- Masonite board
- Stud finder
- Flat-head screws
- Super Glue
- Lego baseplates
- Lego blocks
Directions:
- Decide how much wall space you are going to use and cut masonite board to size. Keeping in mind that your Lego baseplates are 15" x 15", determine how many of them you will need to cover your board.
- Mount the masonite on the wall by locating a few studs as anchors. Use the flat-head screws to mount the masonite, making sure the screws are flush with the board. If you aren't going floor-to-ceiling with your Lego wall, use a level and tape measure to be sure your board is straight.
- Apply Super Glue to the back of the initial baseplate. Press the baseplate onto the board and use duct tape to secure it into place. Repeat with additional baseplates, using Lego bricks to secure adjoining plates as you go along.
- Let the baseplates dry for 24 hours before allowing your kids to play.
Image courtesy of I-Beam Deisgn + Architecture
Hot Wheels walls
Generation after generation, every kid loves Hot Wheels. And now, you can create the ultimate Hot Wheels racetrack with Hot Wheels Wall Tracks.
The iconic orange tracks get off the floor and on the wall for a whole new Hot Wheels experience. Parents can easily hang the Wall Tracks without concerns over wall damage as they are packaged with 3M Command Strips and an easy installation template.
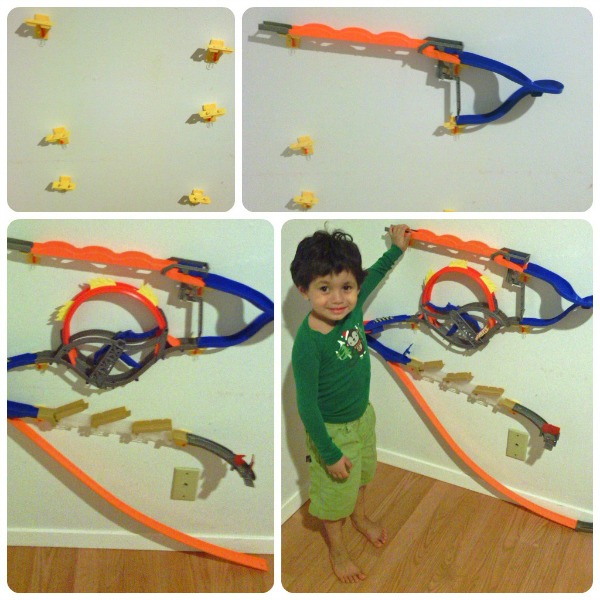
We all know that many toys say that they are easy to put together, but most of the time they aren't. Well, Wall Tracks really are — I tried it for myself, giving my 4-year-old son's room a Hot Wheels makeover.
We started with the Hot Wheels Wall Tracks Starter Set. It includes everything you need with easy-to-follow instructions and a template.
Directions:
- To begin, tape the template up against the wall and adhere the brackets with the 3M Command Strips as indicated. Press each bracket firmly against the wall for about 30 seconds. Remove the template and wait about an hour before adding weight to the Command Strips.
- Next pre-assemble the track pieces as shown on the instructions. They simply snap together. Then follow the guide to add the track to the wall.
- Then, it's time to play! Just load the car in the start gate, engage the loop and push the button to launch. You can use the diverters and switches to send your cars in different directions.
Expansion is easy. You can add the Wall Tracks Power Tower Track Set , Daredevil Curve and other stunt sets with ease. Just follow the instructions and expand the fun.
![]() Quick tip
Quick tip
Did you know that Hot Wheels cars are magnetic? Hang a magnetic knife rack and your kids will always know where to find their favorite cars!
More about play
6 Ways to teach during play
6 Great toys for preschool boys
Educational alternatives to annoying toys