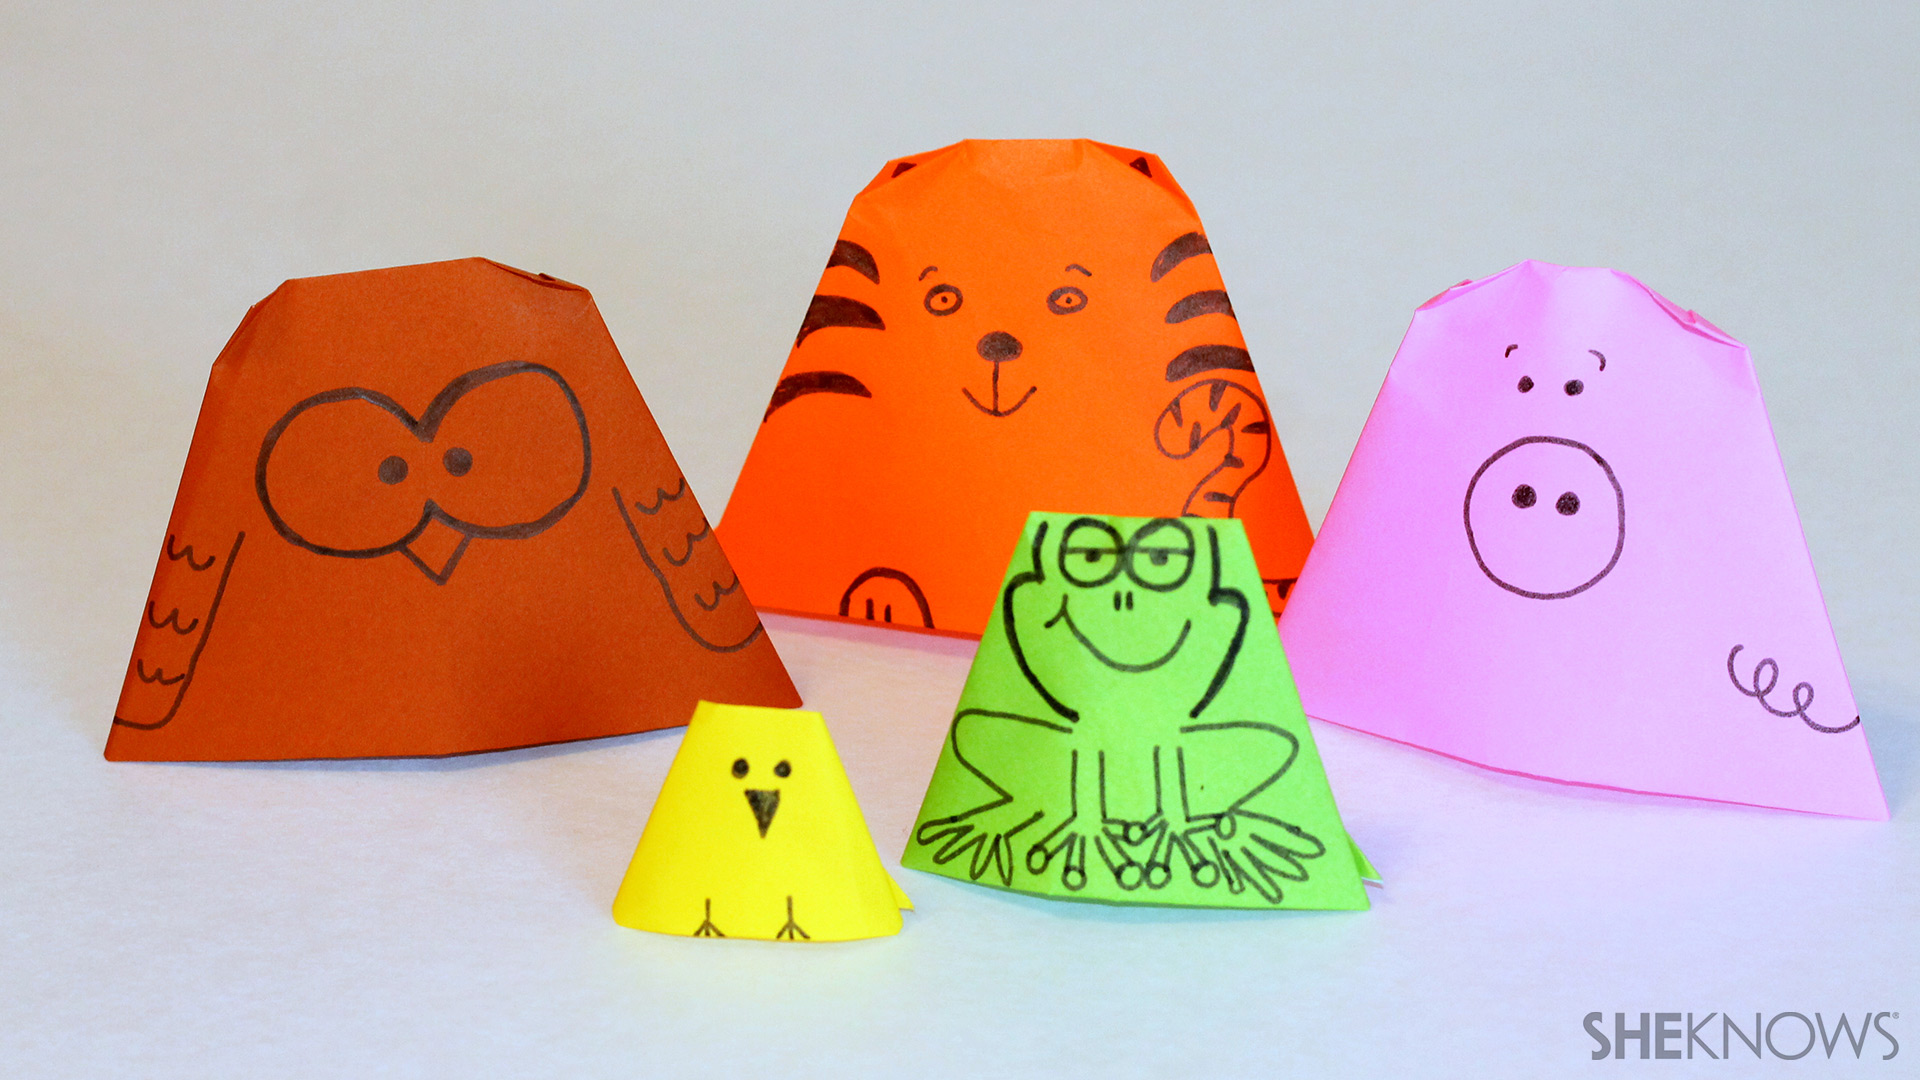
Try these three simple craft projects that incorporate origami paper folding techniques the next time you need a boredom buster: a spinning paper pinwheel, a charming bouquet of hearts and cute animal finger puppets.
Spinning origami paper pinwheel

Supplies:
- 2 pieces of 6-by-6-inch origami paper
- Glue stick
- Scissors
- 1 map pin
- 1 push-pin or brass tack
- 1 small, plastic bead
- 1 wooden dowel
Directions:
1. Prepare the paper and dowel
To create double-sided paper, use a glue stick to coat the wrong side of one sheet of paper and glue to the wrong side of your other piece, making sure the edges are lined up as perfectly as possible. While waiting for the paper to dry, soak 2 inches of the end of the dowel in a small cup of water, to soften, approximately 10-15 minutes.
2. Fold the pinwheel
(Picture 1) Fold the paper in half, diagonally. (Picture 2) Repeat the same diagonal fold. Cut along the fold lines, stopping approximately 1/2 inch from the center for each cut. Pick up one side of one of the triangles, bring to the center and glue into place. (Picture 3) Repeat for the same side of each triangle, stacking each end on top of the previous one and glue each layer into place, as you stack.

3. Attach paper to dowel
Thread a bead onto the map pin and set aside. (Picture 4) Then, use the push-pin to create a pilot-hole approximately one inch from the end of the dowel, as shown. (Picture 5) Thread all layers of the pinwheel, through the center — where you glued the layers — onto the map pin and then carefully insert into the pilot hole you created on the dowel. The pinwheel should spin freely when you blow on it. If it doesn't, you may need to make an adjustment to the pin — either push it in more or pull it out a bit. You can put a dot of white glue into the hole prior to inserting the pin if your pin doesn't stay put.
Bouquet of origami hearts

Supplies:
- 16 pieces of 6-by-6-inch origami paper
- 4 wooden dowels
- 12 metal dowels (found in the miniature train section of most hobby stores)
- Glue stick
- Jar
Directions:
1. Fold the hearts

First, you will fold all of the hearts for your bouquet. Two different sized hearts were used to create this bouquet, but the steps are essentially the same. Start with a piece of origami paper. (Picture 1) Fold in half, diagonally. (Picture 2 ) Then fold in half, again. (Picture 3) Open up the folds and lay flat, diagonally. Then, fold diagonal points into the center, as shown. (Picture 4)

Open up folds, rotate paper and repeat that same fold. Open up all the folds and lay paper with a point facing up- you should now have a flat paper, with a diamond fold mark with a cross fold mark in the middle, as shown. Now, fold in the right and left flat, to the side points of the diamond fold mark. (Picture 5) Pinch those folded flaps and fold over on the diamond perimeter folds, as shown. (Picture 6) To create the longer heart, stop here and pinch the pointed flaps that are situated in the middle of the diamond and fold the points down, to create a long heart shape. (Picture 7)

If you are creating the smaller heart, push the folded flaps to one side and flip your diamond shape over. Fold the pointed ends toward the center and fold. (Picture 8) Finally, fold over the corners, to create the bottom point of the heart. (Picture 9) Fold the heart shape open to create the smaller heart. (Picture 10)
2. Glue the hearts onto the dowels
The hearts have an open flap bottom. Simply cover the inside of one of the flaps with the glue stick and glue each inside to the end of a dowel. You could use clothespins or paper clips to pinch the hearts together as they dry.
3. Create the arrangement
To create an arrangement as shown, just fill a small jar with sugar, salt or rice. Then place your larger dowels/hearts in the middle. Fill in with the smaller hearts, just as if you were arranging flowers. There is no right or wrong way to arrange these — whatever you, or your child, thinks looks nice. If you used the metal sticks, you can bend them to create the perfect arrangement.
Finger puppets

Supplies:
- 1 piece of 6-by-6-inch origami paper
- Marker
Directions:
1. Fold the puppet

Fold the paper in half, diagonally. (Picture 1) Next, with the folded side facing up, fold the right flap over to the left, as shown. (Picture 2) Repeat for the other side. (Picture 3) Open up and fold the top layer of the resulting triangle down. (Picture 4) Then, tuck the other flap into the middle of the puppet. (Picture 5) Finally, fold over the top corners (to create ears, if desired. (Picture 6)
2. Add decoration
Use permanent market to draw faces/bodies to create your animals. You can use different sizes of paper to create different sized puppets. The small, yellow chickie was created using a 3-by-3-inch piece of paper.
Origami takes just a moment to learn — but perhaps a lifetime to master all of the intricate folds. These simple projects are a fun and easy activity to do while also spending time with the kiddos.
More family fun
10 Crafts you remember from kindergarten
DIY Puffy paint for kids
Outdoor projects for science-loving kids