
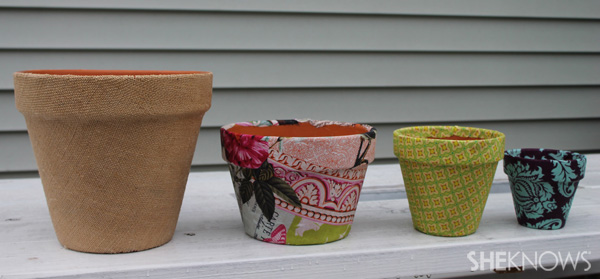
Fabulous art for outside
Turn boring terracotta pots into unique and colorful garden art with just a few simple and inexpensive items. This is a DIY project that even the novice will find simple to complete.
Grab the kids and head to your local home improvement store to gather some supplies and have this easy planter project completed in almost no time at all.
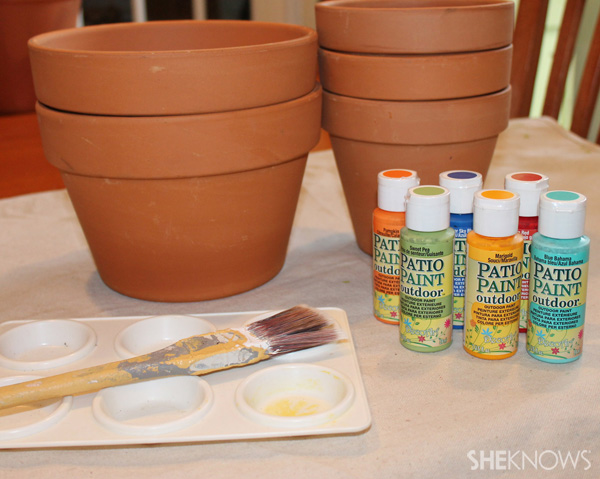
Supplies for painted pots:
- Outdoor paint, in various colors
- Paint brush
- Unfinished terracotta pots
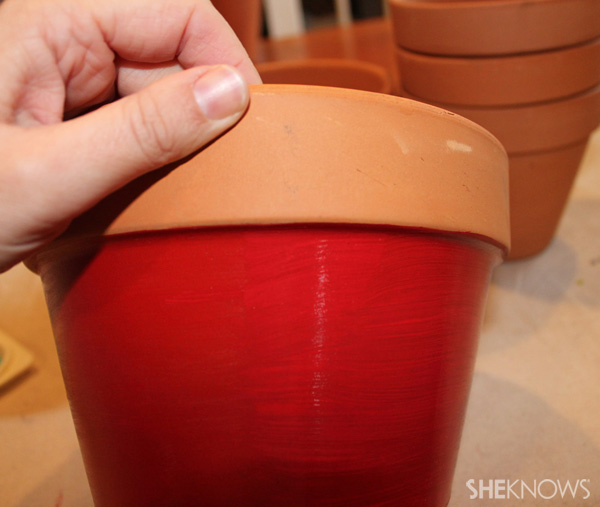
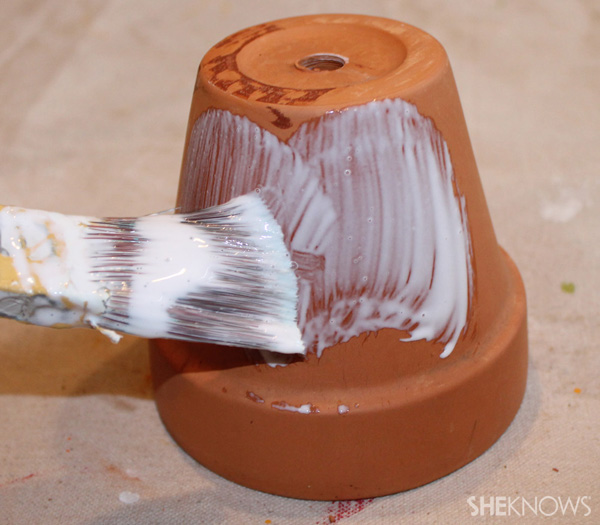
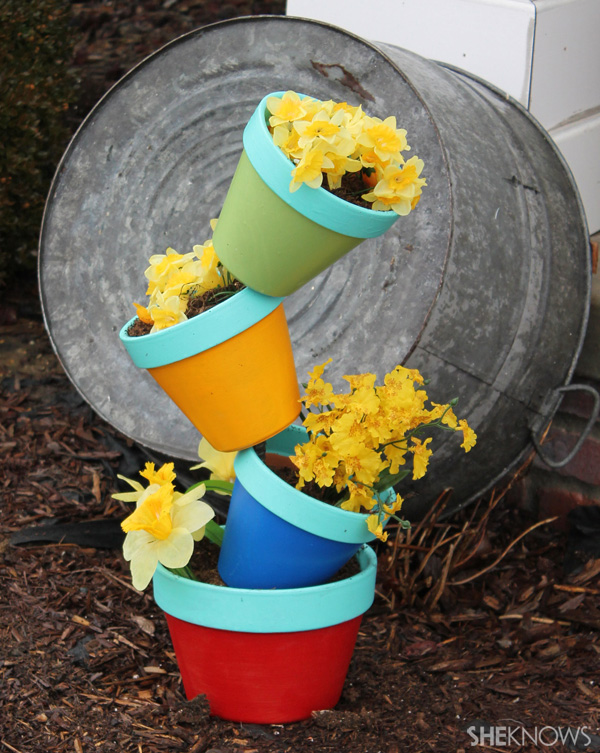
To begin, make sure the pots are clean and dry. Apply the outdoor paint in one or two thin coats, allowing to dry completely between each coat. Painting the rims of the pots the same bright color creates visual unity for your project. If you are making this project with kids, you could have them paint the base of the pots as they wish — dots, stripes, zigzags or hearts. Painting the rims the same color throughout will pull this look together as well. Allow the paint to dry for at least 24 hours before assembling your pot tower.
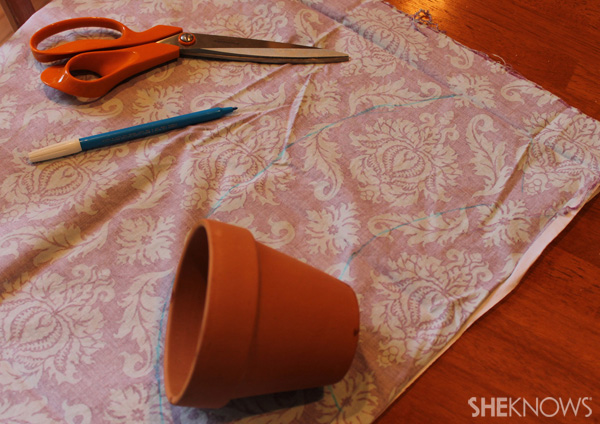
Supplies for decoupaged pots:
- Fabric
- Outdoor Mod Podge
- Scissors
- Marking pen
- Paintbrush
- Unfinished terracotta pots
Instructions:
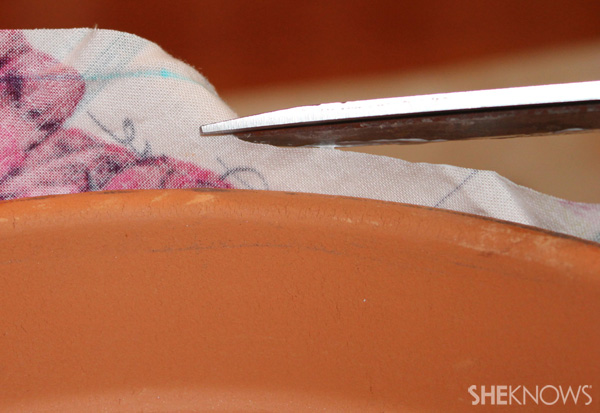
To begin, you will need to trace the shape of your pot onto your fabric. To do this, set your pot on its side near the edge of the fabric. Mark a small line on the top edge of the pot. This is your starting point. As you slowly and carefully allow the pot to roll along the fabric, trace the path that the top edge takes on the fabric with your marking pen until you roll the entire pot circumference along the fabric. Now repeat this process, allowing the top edge to follow the line you drew, but this time tracing the path along the bottom edge of the pot. Cut out this shape, leaving an inch along both edges.
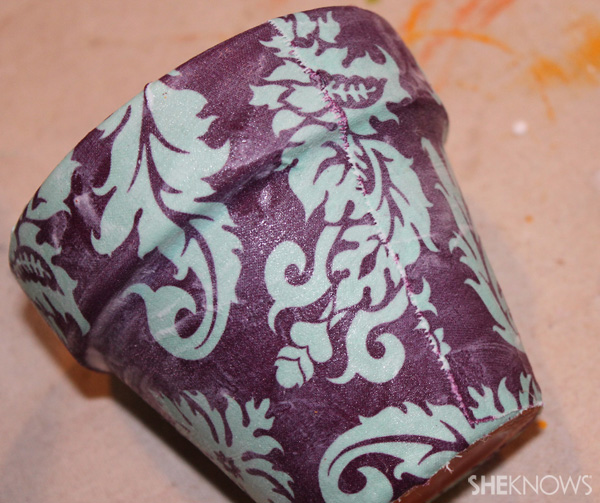
Next, cover the outside of your pot with the Mod Podge. Carefully wrap your pot in the fabric, trimming away as needed.
Finally, use your paintbrush to apply a coat of the Mod Podge on top of the fabric, using your fingers to press and smooth out the fabric to the pot. Allow to dry completely.
Supplies to assemble the colorful pot stack
- Three to five terracotta pots, finished as you wish.
- Hammer
- 4-foot piece of rebar
- Potting soil and plants
Instructions:
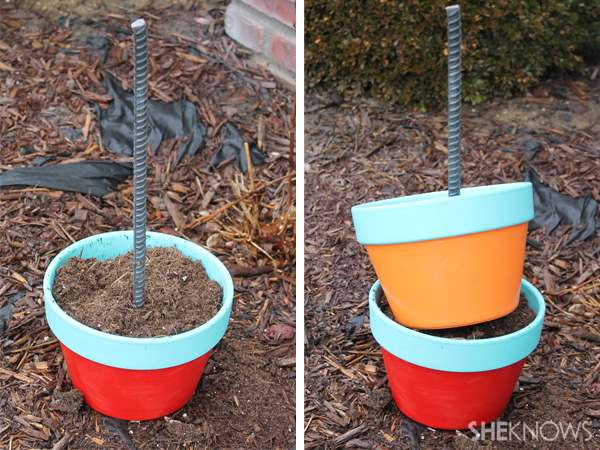
First, use your hammer to carefully insert the rebar at least 12 inches into your desired location in your garden. Next, thread the first pot onto the rebar, through the drainage hole in the bottom. Then, carefully fill that pot with an ample amount of potting soil. Next, thread another pot in the same manner, resting the pot into the soil at a slight angle. Repeat with the potting soil. Next, thread another pot onto the rebar, this time angling the pot in the opposite direction and resting the bottom on the top edge of the previous pot. Repeat these steps until rebar post is no longer visible and you have attained the desired height. Carefully pot plants as desired.
More family crafts
How to make homemade play dough
How to create a bug catcher
Create a DIY kite craft